View Transaction History
-
From the Home screen, click the Transaction History tab.
-
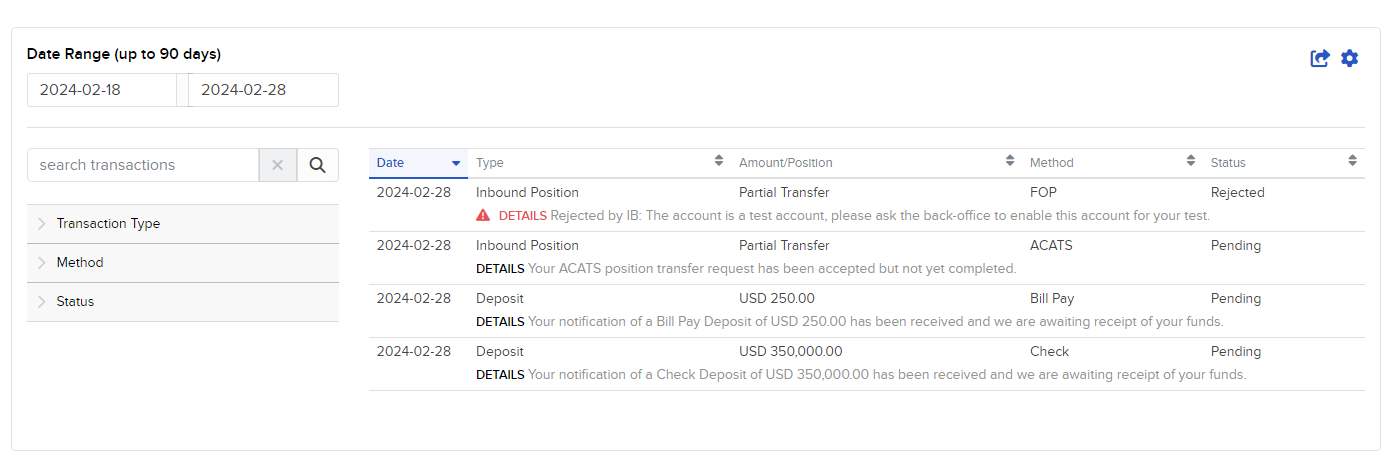
By default, the Transaction History page shows all of your funding transactions for the past ten days. You can view transactions up to the past 90 days.
-
By default, transactions are displayed by date in descending order. Change the sort order by clicking any column heading. To change the sort order from descending to ascending, click the column heading again.
For example, if you want to view all deposits listed together, click the Type column heading.
-
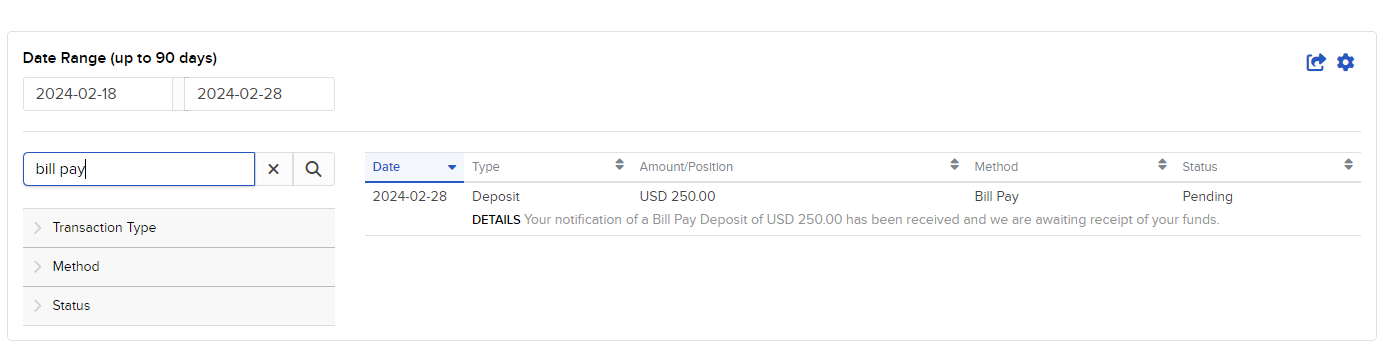
Search for a specific transaction by Account ID, Account Title, Transaction Type (deposit, withdrawal, etc.), Transaction Method (check, wire, etc.), or Status by typing the search criteria in the Search field, and then clicking the Search (magnifying glass) icon. Search words are not case-sensitive.
For example, if you just want to view Bill Pay transactions, type "Bill pay" in the Search field and then click the Search icon.
-
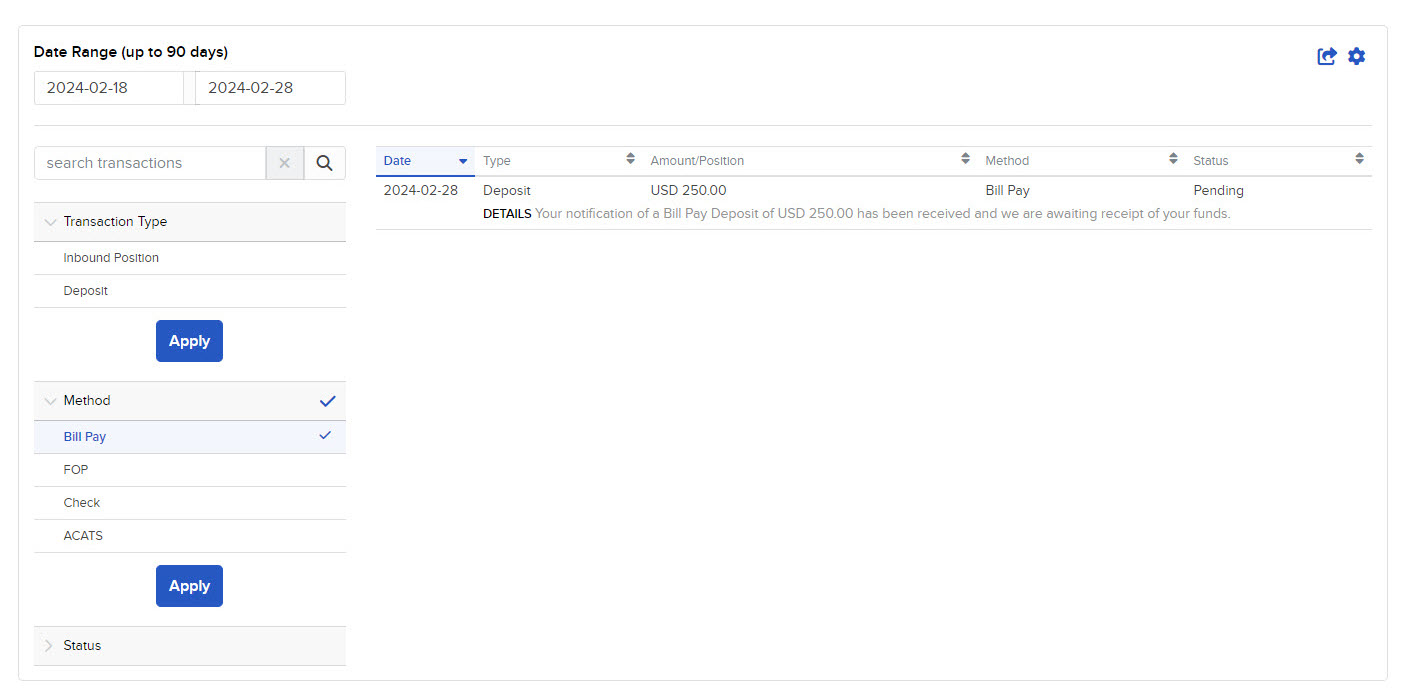
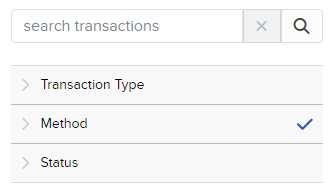
Filter the transaction history by Transaction Type, Method or Status.
-
Click the filter button on the left. For example, click Method.
-
Click the filter criteria as required. A check mark appears next to your selected criteria. For example, to filter the transaction history by Wire transactions, click Wire under the Method filter.
-
Click Apply.
The screen updates to display only those transactions for the selected period that match your search criteria.
-
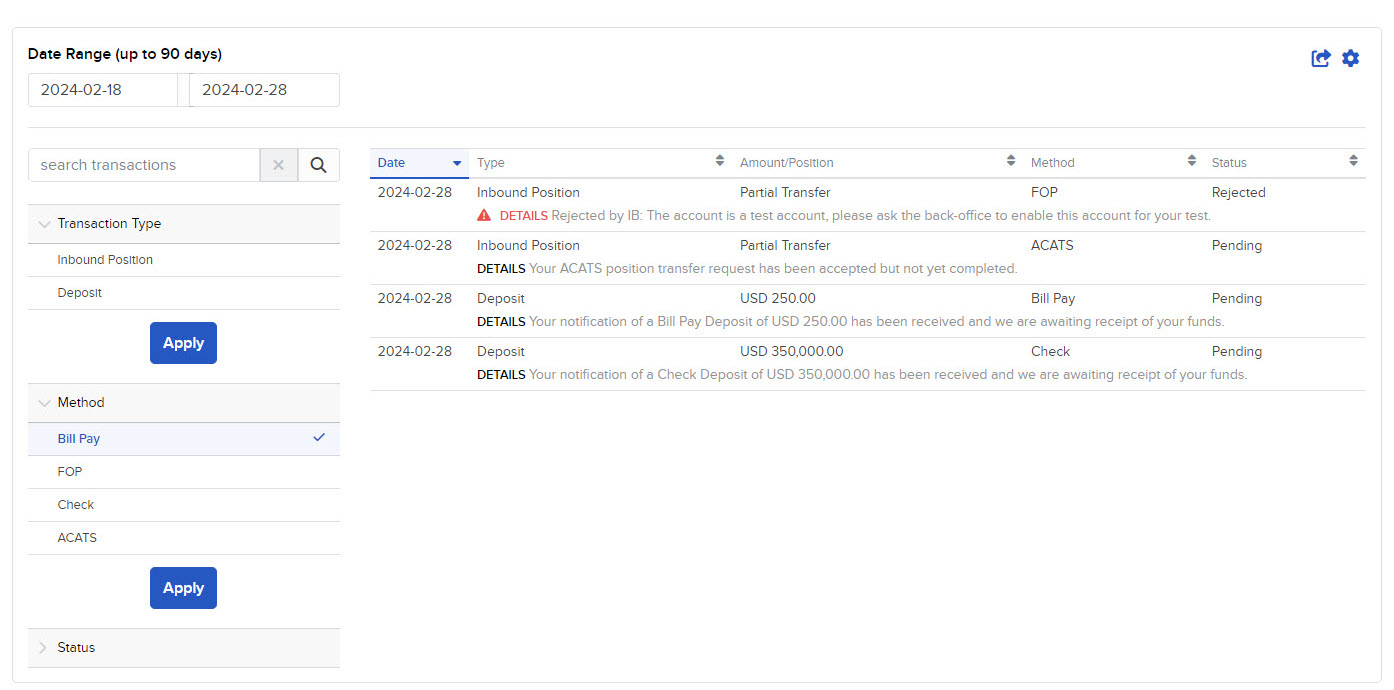
To undo your filter, click the filter criteria again to remove the check mark, and then click Apply.
-
To print the transaction history as currently displayed, click the Print icon located in the upper right corner of the screen.
-
To export your transaction history to an XLS filei (Microsoft Excel-compatible), click the Export icon located in the upper right corner of the page. You are prompted to save or download the .XLS page to your computer (depending on your web browser). Once saved, you can open that file in Microsoft Excel.
-
Click the Configure (gear) icon to configure the transaction history to display additional information, including Account ID, Account Title and Method.
-
Select the additional fields you want to display.
-
Click Apply.
The screen updates to display the additional column(s) of information.